
Hints on Painting Furniture
Please note that you might also like to view my Painted Furniture page here, updated 2016, after reading this original post with its hints on painting furniture using various types of paints.
Please note that you might also like to view my Painted Furniture page here, updated 2016, after reading this original post with its hints on painting furniture using various types of paints.

Thanks for all your lovely comments on my last post!
It is interesting and gratifying to see I am Not Alone when it comes to husbands/partners and painted furniture! They just don't understand the yearnings some of us have for those wonderful pale painted French and Scandinavian interiors we drool over in the magazines!
Several people have asked how to go about painting their furniture, and although I am no expert by any means, I have over the last few decades painted many pieces of furniture and learnt by my mistakes and seeing what differing results you get using different methods.
So I am more than happy to pass on what I have learnt, but there is no one right way and everyone does things differently, but I hope this helps.
So I am more than happy to pass on what I have learnt, but there is no one right way and everyone does things differently, but I hope this helps.

Generally speaking, the method you use will depend on what type of furniture you are painting, the condition and finish of it, and what end result you are after.
For heavy wear items such as chairs, tables etc, I always use a satinwood paint as this is more durable.
For lighter use items such as occasional use tables or smaller items, you can use emulsion and then wax or varnish after.
Unless an item has layers of badly painted paint and you want a really smooth fresh finish, there is usually no need to use stripper - a light sanding is usually sufficient for most pieces, and I have found that thoroughly sanding even old fashioned heavily varnished furniture is sufficient to provide a sound base for painting, but do use a mask and goggles in a well - ventilated area or do it outside as its messy!
Having said all that, there are no rules so you can do as you please!

Edited 2012 - 2016
Having discovered chalk paints since writing this post, in particular Annie Sloan Chalk Paints ( as I went on an Annie Sloan Chalk painting course at Dovetails Vintage in Sevenoaks, Kent ) I may never need or want to try any other paint for transforming my furniture!
Below are just some of the projects I have completed in my home since 2012 using AS Chalk Paints. I get my paints from a great stockist of AS paints, waxes, stencils and brushes, called Dovetails Vintage, run by Perry and Sue and their talented team, and who also run Annie Sloan painting courses. Best of all, they do mail order!

With AS Chalk Paint there is............
No sanding!
No priming or undercoating!
Just whack the paint on - go grab that brush now!
(Please note that I have received no renumeration in any form for this post and I have no links or affiliation to either AS Chalk Paints or to Dovetails Vintage - this post purely represents my own views and experiences on trying various paints and painting techniques over 30 years)
See the links at the end of this post for links to posts on painted furniture using Annie Sloan Chalk Paints.

Now on with my Hints on Painting Furniture using emulsion, satin wood and other paints.

The chest of drawers in my previous post was a pine chest which had been stained with antique pine stain with a light matt varnish finish, and this is what I did for a relatively quick and basic refurb.
Removed drawers and placed chest and drawer fronts facing upright on dust sheet.
Sanded all surfaces to be painted using a medium or fine sandpaper, to remove surface varnish* and provide a key for painting.
Wiped thoroughly with a wet cloth to remove all dust.
Painted one coat of satinwood paint and allowed to dry
Painted second coat of satinwood and allowed to dry.
Sanded corners and edges randomly using a fine grade sandpaper.
Wipe down after sanding to remove dust.
Finished!!
I could have painted the unpainted wood with a combined primer/undercoat after sanding and wiping, as you would if you were decorating, but I find it more difficult to achieve the shabby worn look of knocked about furniture if I do that.
But if you were after a smooth, non-shabbied end result then I would recommend using primer/undercoat first as the item will look unsullied for longer!
I picked up this little two drawer chest above at the charity shop last year. It was that heavily brown varnished 40s/50s type, but had lovely shaped legs and detailing, with the original ornate handles, and was well made with dovetailed joints and a brass plaque with the makers name inside.


I updated this using Homebase emulsion matchpots in two shades of grey, so it probably only cost me a couple of pounds! For this, I roughly followed the instructions given in a Homes and Antiques magazine using emulsion and wax.

For this chest I did the following:
Masked and goggled, with front door open, and the chest on a dust sheet, I sanded using medium grade paper - loads of nasty brown dust!!
Wiped with wet cloth and allowed to dry.
Painted two coats of Homebase Sanctuary "Shadow" matt emulsion from a tester pot, allwoing each coat to dry inbetween
Then painted one coat of "pebble grey"
When dry, I sanded all over to achieve a smooth, softly blended finish, sanding more along the edges and detailing back to bare wood or to the colour underneath.
Wipe down with wet cloth and allowed to dry.
Using soft cloth, I wiped Briwax antique pine wax all over - this instantly gave it a deeper colour and it bought out the different tones. It has a soft sheen and a time worn aged look to the surface. This feels beautiful to the touch as it is sanded all over before waxing.
I love the look and finish of this piece, it feels good and looks a lovely aged grey/blue.

I did something similar to the large pine mirror picked up for £7 in a charity shop, only I distressed this a bit more and used more of the lighter grey paint (due to family pressure- I preferred it darker grey!


Here's a few other examples of furniture I have painted.
my dressing table

I found this in the garden of a good friend 10 years ago - it was waiting to be taken to the tip - between us we managed to squeeze it into the back of the little ford escort hatchback I had at the time!
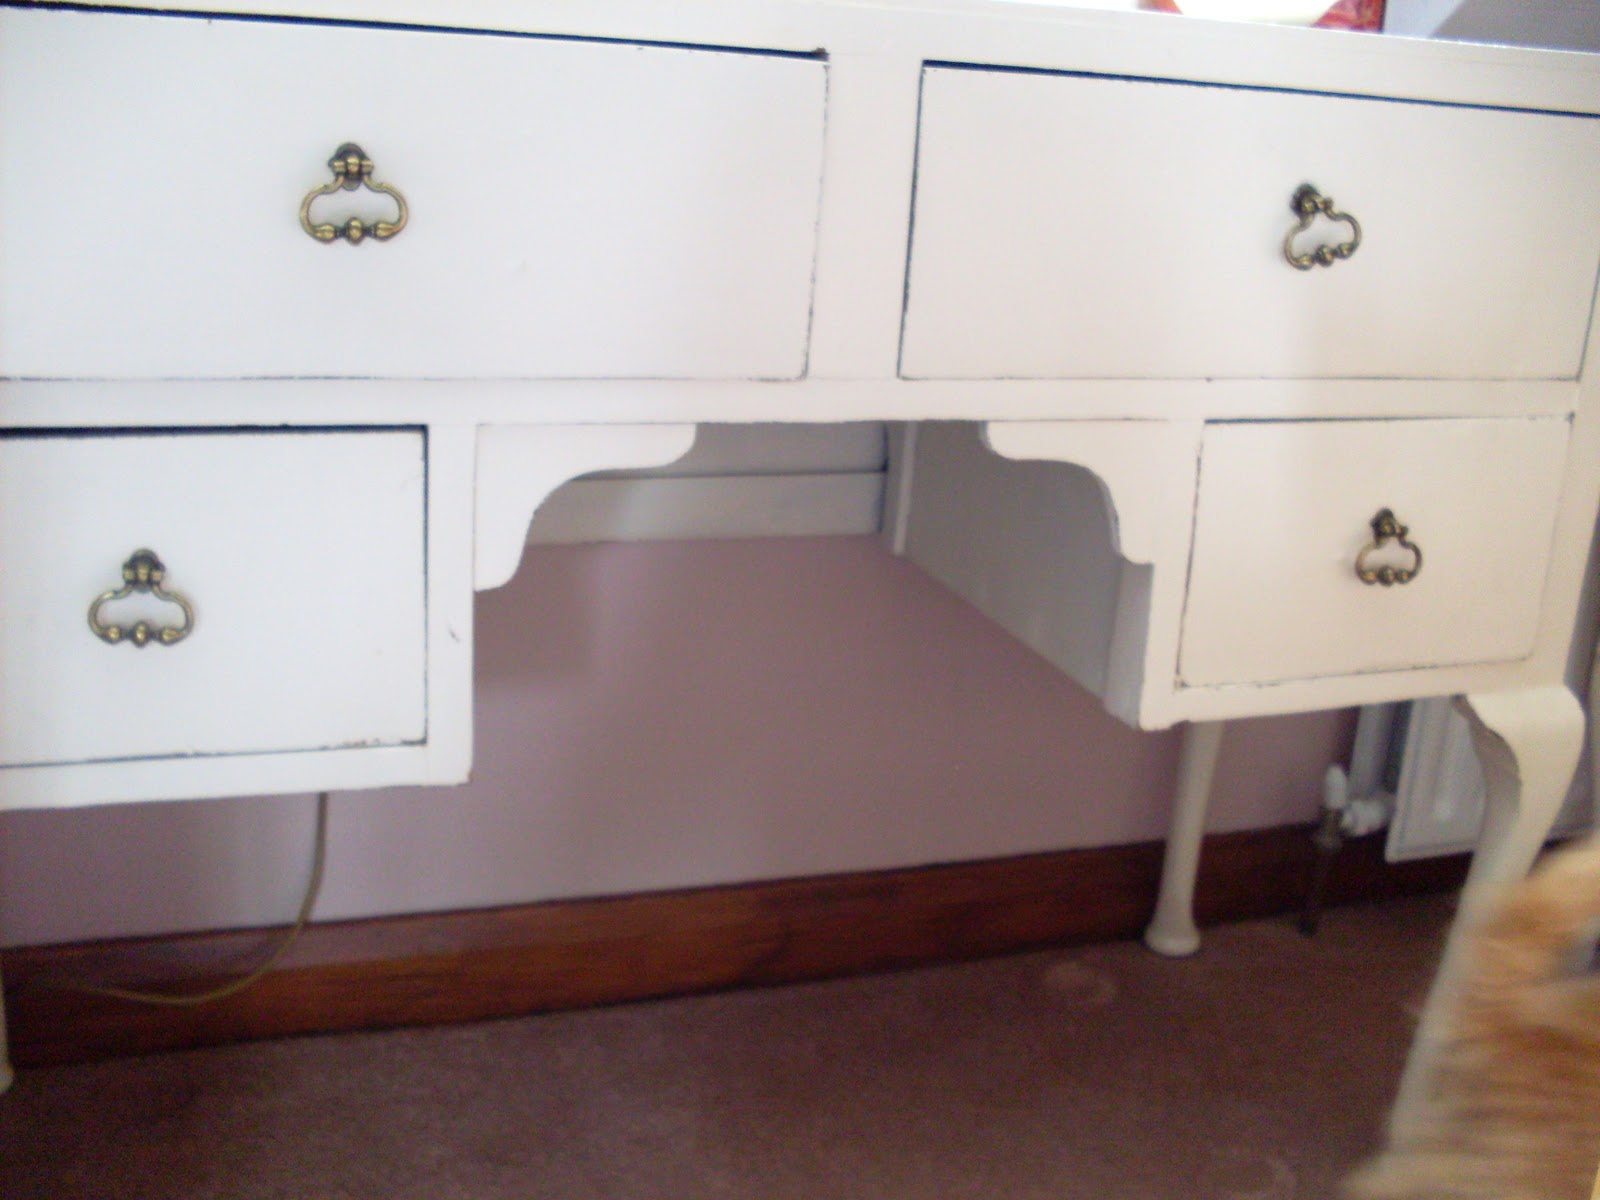
Mr G removed and replaced the warped and damaged desk top, then I sanded off the old varnish and gave it a few coats of a creamy white satinwood, then lightly distressed the edges.

I replaced the old knobs with antiqued brass handles and I still use it as a dressing table now.

See, theres Logie sitting in front of it this morning!

This old Ikea coffee table had its legs painted with a couple of coats of off white emulsion, then they were lightly sanded to distress them


This hardwoord chair was one of four purchased recently off eBay for £10. They are excellent heavy quality, and I am in the process (ha!) of painting them in a Farrow and Ball eggshell paint - Wimbourne White I think.

As I don't want to distress them, I have sanded, used an primer/undercoat and then 3 coats of paint to create a solid soft sheen effect.

So if you haven't already had a go and making over your old 80s pine furniture, I hope this might have inspired you to have a go!
It's not difficult, just a bit messy and time consuming, but the difference that a few coats of paint can make are amazing!
And don't feel you have to stick to whites and creams!
I am seeing and loving bright pinks and turquoise painted furniture (see my May 5th birthday post, 51 Kisses) and also darker painted furniture in magazines now.


The other day I was lucky enough to come across this lovely old painted mahogany glass fronted china cabinet already painted a beautiful subtle petrol blue/green, a very Shaker type colour I feel.
The inside was less beautiful, a dark maroon, but I painted this with a couple of coats of my favourite Dulux jade white (a lovely palest duck egg blue ) and now it offsets my vintage china beautifully.

A Few Tips
So really, in response to your questions, it shouldn't involve endless sanding, but you need to provide a smooth dust free surface to paint.
I never bother stripping off previous varnish or paint if I'm repainting, just a quick but thorough sand (medium or fine grade)by hand should prepare a good surface, then wipe down with a wet cloth to remove dust.Then paint.
If you want a solid undistressed lasting finish, use a combined primer/undercoat for bare wood or wood previously varnished or stained (after sanding), or just go straight for painting if previously painted.
Use satinwood for a harder wearing finish (no need to varnish or wax)which you can subtly distress the edges and corners but is difficult to sand or distress anywhere else.
If you want to achieve a more shabby look then a few coats of emulsion instead of satinwood will allow you to distress the wood as much as you want, maybe using different shades of paint to achieve depth and interest, and you can achieve a lovely smooth finish all over too if you gently sand all over afterwards using fine or between layers sandpaper. If you've used emulsion you will then need to either wax (something like briwax antique gives a darker more aged look) or use clear matt varnish.
You can use brushes, pads, rollers or spray the paint on. I have tried them all and they all have their merits and downsides. I personally don't like the look achieved with rollers, but pads can be quite good for large areas. Spray paints I find expensive and wasteful but the results are very smooth. Having tried them all I have come back to the good old fashioned paintbrush, and I personally think it is worth paying a bit more for good quality brushes that you use and re-use rather than the the cheap "use it once and throw it away" types, as the end results are much superior.
* a note on sanding - Use a face mask and goggles and have window/door open - this is particularly important if sanding old furniture with layers of thick, heavy varnish, and older varnished furniture will require more diligent sanding and maybe a coarser sandpaper first. You may decide in this case to use a proprietary chemical stripper. The same applies with old, heavily painted furniture - unless you are happy with a less than perfect shabby look, you may want to strip it first.
And never forget, if it goes wrong or you dont like it you can simply sand and re-paint!
Have fun!!!!
Oh - and don't forget to wear old clothes (yes Mum!) and check the mirror before you leave for the school run for those smears on your face and white tipped hairs (!!!!)
Just leave you with a few inspiring images that will have you reaching for your paintbrushes....


.For more posts on Painted Furniture, especially those using Annie Sloan Chalk Paints, please click on the links below.......

Painted Kitchen Dresser in AS Old Ochre

Painted Bureau in AS Country Grey and AS Original

Painted Coffee Table in AS Country Grey and AS Original

Painted Chest of Drawers in AS Antoinette
Painted small table


Painted shabby chic flower pots as above
and other painted furniture projects here
Have fun!!!!
Oh - and don't forget to wear old clothes (yes Mum!) and check the mirror before you leave for the school run for those smears on your face and white tipped hairs (!!!!)
Just leave you with a few inspiring images that will have you reaching for your paintbrushes....


images from Vintage Home
.For more posts on Painted Furniture, especially those using Annie Sloan Chalk Paints, please click on the links below.......

Painted Kitchen Dresser in AS Old Ochre
Painted Bureau in AS Country Grey and AS Original

Painted Coffee Table in AS Country Grey and AS Original

Painted Chest of Drawers in AS Antoinette
Painted small table


Painted shabby chic flower pots as above
and other painted furniture projects here
Thank you for the hard work that you have but into this very useful post. The items that you have done look amazing. I certainly have a project or two to get started on - now where did I put my paintbrush?
ReplyDeleteHey Gilly, I have FINALLY gotten to posting about the Leibster Blog Award you graciously honored me with...but help! having difficulty with putting the badge into the post and onto my sidebar. yiyyy.
ReplyDeleteWhat a great tutorial on painting you've put together! I can't imagine how long it took! Thanks for the info on using the wax, I had completely forgotten about it.
ReplyDeleteI agree 100% about using the mask and protective eye-wear when sanding. The cleaning process is also important as you pointed out. Two pieces of equipment I use are an electric sander. I like the smooth and even surface it leaves and disposable rubber gloves, like the kind they use in hospitals. I always seem to have paint under my nails and on my hands . . . messy painter I guess!
Well, I have started painting the fireplace. I'm going to be applying coat #3 today! Talk about stink! I'm using an oil-based enamel and it needs to dry for 24 hrs. between coats. The 1st coat was just sucked up by the brick, I probably should have used a sealer . . . live and learn!
Did Mr. Adorable Logan get a treat after posing for that pic? Duke stayed with me while I painted both days. He sat in his little bed on the couch and watched everything, I kept telling him how helpful he was and asking him what he thought! LOL!!!
Did you recover your chairs too? That's another project I have waiting for me when I move into phase II of my painting!
Ocean Breezes - Like Duke, Logan is never far away when I do anything - we joke and call him a good painters dog, a gardeners dog, a quilters dog etc, depending on what I've been doing that day!
ReplyDeleteThanks for adding the info you did - thats really helpful.I tend to forget the gloves except when sanding!And can never find the electric sander!
Yes I did re-cover the chair - but like many things in this house, it is awaiting the finishing touch in the form of pretty braid to cover the staples or fancy headed studs!Yet another UFO!
HI Gill,
ReplyDeleteThanks you so much for doing this wonderful tutorial and your detailed comment. As Caroline said it must have been a lot of work but it is truly appreciated and will be put to good use. I am torn now between playing safe with a plain finish or going mad and trying the distressed look I like so much. You pieces look absolutely great.x
Excellent informative post - thank you! And fab pics - of your work, and other ideas. My tip? Annie Sloan paint - http://www.anniesloan.com/ - gives a chalky 'French' finish - and needs NO preparation at all! Abby x
ReplyDeleteWow Gill, you've been working hard! I feel inspired to get on and do our chest of drawers... but perhaps I'll just sit and do a little more hooking first... Also wanted to let you know there is an award for you on my blog! :)
ReplyDeleteJane x
Hi Gill,
ReplyDeleteThanks for your advice. I will be painting an old cupboard soon so I can use your tips.
Lieve groet,
Madelief x
Thanks so much for the tips, so useful - and like OB and CS, I must get some wax. All those pics made me drool! xx
ReplyDeleteHi Gill- thanks very much for this. I am inspired. It is a good reminder about what is possible in our lives! Gilly
ReplyDeleteHi Gill, thanks for an informative and great post, it must have taken you ages. I have old 80's pine furniture in my bedroom. It has never occurred to me to paint it. What a brilliant idea. So when I've finished a few projects I'll set my mind to it. Of course, I'll not be mentioning any of this to The Col, I fear I'd get the same response as you!!!! Lesley x
ReplyDeletewow thank you for such a detailed post. Your furniture looks amazing you have done a great job on it all. I love all your tea cups in your cabinet ;-) dee x
ReplyDeleteLovely informative post with brilliant pictures:o)
ReplyDeleteI love what you've done! And I especially love that cabinet and all that china :o)
have a great weekend. x
Wonderful post, Gill. That's the way I paint my furniture too, but it's a lot of work to actually put it into words like that! I love all the things you've painted, and the china cabinet painted in that petrol blue looks so nice, what an improvement on the brown ones..Love the inspirational pictures you chose too.I haven't painted anything (apart from a box for a design project) since I did the potting shed last month!! Time to do some more...
ReplyDeleteHave a lovely day! Helen x
Thankyou everyone for having the patience to read through my rather long post!
ReplyDeleteAnd apologies to those "old hands" who already know it all and more, and to anyone not interested in the slightest!
It was aimed at those who asked how to, who haven't painted before, and I hope they now realise that it isn't difficult, but to just have a go!
Thanks for those people adding extra info and tips - that helps all of us! Must check out the Annie Sloan paints - i tend to have a very much make do and mend approach, using what I have to hand, but they sound terrific - just whack the paint on, yay!!!
Keep the tips coming!!!
Gill
Hi Gill,
ReplyDeleteCongrats on your blog award from Jane, and thanks for visiting my blog. I am so glad I found your blog through Jane because I LOVE it. I cannot believe you just posted the tutorial on painting furniture because I am just getting started on a project in which I will be painting furniture. I love when things come together like this. I will stop by often. Have a great day.
xoxo Susan
Hi Gill,
ReplyDeleteWhat I'd actually love to do is to paint something pink, like that fab pink dressing table but to say The Col would loose his sense of haha would be an understatement. Which reminds me, I must post about the old toilet filled with flowers!!!! Lesley x
Some great tips there. You've made a great job of all the furniture you've already painted.
ReplyDeleteYou've done some great makeovers. I love the glass cabinet.
ReplyDeletex
Much much inspiration, Gill!
ReplyDeleteHave a lovely evening o xx o
Well, I seem to have lost most of the comments on this post after the Blogger problems of the last few days, so sorry folks!
ReplyDeleteI will try and copy and paste them from my google mail if i can as they were very useful and interesting comments, as always.
Gill xx
Gilly, what an amazing and inspiring post!
ReplyDeleteI've been slack in the 'painting furniture' department. I have 2 big pine bookcases, some display shelves, and 2 smaller bookcases I've been meaning to have a go at painting for..... oh....years I think!
I REALLY have to get off my backside and give this a go. I absolutely adore brightly painted furniture, and drool over it in any pics I see.
Thanks so much for the run down on what to do, your way sounds easy and not to hard to manage.
Do you use a power sander or sand by hand? I'm thinking I'll get one of those little mini mouse powered sanders to make it easier.
Thanks again for such a great post with all the delightful pics as well.
Linda. xox
My girlfriend is redoing a chair for me in this process, I can't wait.
ReplyDeleteYour furniture looks amazing!
Little Logan looks so sweet! George has been so busy chasing rabbits!
I have so missed you and your blog!
Many changes for me as of late along with a new blog!
Some fabulous advice and inspiration here, Gill. Thank you for sharing. I have a honey pine dresser that lives in the garage as it is dated and yukky! I love the unit, but not the finish. However, I might just have a go at painting it this summer now.
ReplyDeleteBecky x
Hi Gill, thank you so much for all the great info in this post. I have just really started on the painting furniture thing and have completed a make over of one of those 80's pine bedside cabinets for my little girl. This has got me quite inspired!
ReplyDeleteps I had an adorable apricot poodle as a child so seeing your gorgeous dog just brought back some lovely memories.
x
Gill, what a lot of work you have put into this post. Very helpful and inspirational too. Love the pink furniture. Love Linda x
ReplyDeleteHi! Just found your post and wanted to thank you for sharing your tips and advice from your personal experience. I was looking for milk painted furniture and for some reason this blog was one of Google's results. The petrol blue glass cabinet looks like milk paint to me, maybe that's it! I am working on painting a cabinet in bright red milk paint and was looking for inspirational pics when I ran into this. I've also finished painting a large tray attempting a driftwood kind of feel and I think I'm in love with milk paint! Have you tried using this stuff? I just started and it's great for that antique look.
ReplyDeleteHi Gilly!
ReplyDeleteYour blog answered a question I just had as I am right now painting my first sideboard. Guess what paint I'm using? Homebase Sanctuary Emulsion!
When I saw it in your pictures I was like YES! Thank god! So I can use emulsion on wood! What I've done you see is to paint my middle dining room type area in HB Sanctuary with 3 walls Delicate Shell and the alcoves in Shadow. This was all great (apart from the instant marks that any paw/finger prints or water marks make! Do not use if you have kids or rowdy dogs is my tip! Though lovely creamy matt paint otherwise).
Anyway I digress. So I thought when I bought my £25 sideboard, that I needed Eggshell, but you can't get it in Shadow or Delicate Shell, so I went to the Dulux Decorators Centre and had then make up the exact match, which I guessed at being 'Dusted Moss' in Diamond Eggshell (waterbased low VOC). It is spot on if you ask me so I'm really happy with my choice BUT, I didn't realise I could use emulsion, as I say on wood and that it would actually give a better 'shabby chic' effect till now. Duh!
I've made a mistake I feel in that I spent ages hot air gunning all the varnish off my veneered chipwood and then chemically stripping off the remainder, before priming with Ecos Waterbased floor paint I had leftover from the stairs, (which is a no VOC, primer, undercoat and satin topcoat, all in one.)
I found with doing that that the varnish stain was still seeping through, so I went and bought the expensive Zinsser BIN 123 Shellac based High VOC primer, as it was the only primer to say it would cover varnish and seal the stain. Turns out I reckon I could have just mixed some shellac, also by Zinsser with any solvent based colour to make my own version, which would probably seal varnish and give a better base to cut back too.
ANYWAY, I then painted the Dulux Dusted Moss over this with an emulsion roller and brush for fiddily bits and now have a newly painted looking sideboard, NOT shabby chic.
The paint seems to be sticking, but I reckon if you tried really scratching it, the paint would come off to leave the white primer beneath. The Eggshell doesn't seem as 'diamond hard' as I though + its a b*****d to stop from running over the edges and drying with blobs and runs. I've had to sand back and the edges and use a chisel to get the bigger runs off on the other side to that which I painted and that has wasted time.
So i'm at the point now where I do want to go shabby chic. Now I have the go ahead from your post, i'm going to paint over the eggshell with HB Delicate shell and will let this dry before lightly sanding and then going over with Shadow in emulsion and then distressing.
I'll then either clear matt varnish in my leftover BONAKEMI MEGA varnish from my floor, or I'll now also try the Briwax. I looked at the Briwax in the store the other day but it said to use on bare wood only. This is despite seeing that people say you can rub it into painted wood for a better effect. I thought therefore that I must have been imagining it and its expensive too, so I left it for the time being.
Anyway, I think I'll post this spiel on my blog now too, seen as I've written an essay! Thanks again though and you might want to read my blog at http://meanderingsoul.co.uk. It's in its infancy but we all have to start somewhere!
I am truly thrilled to have discovered your tutorial this morning. It is precisely what I hoped Mr Google would find for me! Two bedside cabinets, a telephone table and a six foot "Welsh" dresser will be improved beyond recognition once your wise words have been put into action!
ReplyDeleteThank you so much for taking the time and trouble to write this excellent article, and for sharing it with all-comers. I really am grateful to you.
Marion
North Somerset, UK
This comment has been removed by the author.
ReplyDeleteHI
ReplyDeleteGreat site really enjoyed browsing through. I wonder if your can advise me. I ve decided to paint my chairs and re-upholster. I'm using satin wood paint but the trouble is it is peeling off easiely. Any suggestions? I ve done two coats to far, and will probably need another coat. I m thinking of a clear matt varnish to protect the paint coming off. What would you recommend??
Thank you again
Annette
Hi Annette, thanks for your comment and questions.
DeleteWith satinwood paint, you do really need to sand, prime and undercoat first, otherwise the paint will tend to chip easily or peel off if knocked, as it needs the base-coat to provide a sound base to adhere to. As you have already done two coats, you could try lightly sanding before adding a third coat - this may help it stick better. Topping with a coat of clear matt varnish might help, but satinwood shouldnt need it, and it can tend to make a light colour look a bit yellowy and it probably won't stop it chipping and peeling. Still, it shouldnt peel too badly - i have used satinwood without the basecoats before, and although it chipped and peeled a bit where knocked, the bulk of the surfaces are still perfect. Good Luck!
It looks great. I love the green chair.
ReplyDeleteMark
Very well, Nice post. Good information for sharing.
ReplyDelete10 foot pet gate