Friday 13 December 2013

Cosy Time


Well, it's getting closer to C-Day and yet it's still not looking very Christmassy here. 

Just a few little touches starting to appear, but I'm aware that I should be a lot more ahead than I am.


And that's because even though I have been pretty busy Christmas shopping, with most of the presents, food and drink now bought, I am rather guilty of getting side-tracked with other things.

Crochet things!


And this crochet book by Nicky Trench is to blame!


I have been dying to have a go at crocheting these pretty lacy gloves ever since the book arrived a couple of months ago.


And then I thought they would make an ideal present for my sister, so here they are in all their soft mauve glory!

(It's OK, she rarely has time to read my blog so she won't see them!)


As with anything I make, whether it be food, sewing or crocheting, I am incapable of following instructions without resisting the urge to change them and put my own stamp on whatever it is.

With these gloves I decided that as pretty as the lacy finger-less edges were, I wanted a scallopy shell edging. 

So I added one. 


I made a crochet scarf for my sister a couple of years ago, and this colour is one that is in it, so they should match her scarf.

I hope she likes them!


This young man has been keeping close whilst I have been on my "crochet roll" in the evenings.


And these colour yarns from my stash inspired the next project I made this week from the same book.


Again, one that I have wanted to make ever since the Nicky Trench book arrived - a cafetiere cover.


My version below


And here we have the "gillyflower" touch - ad-libbed vertical stripes at the handle, but this time not because I wanted to add them, but because I had to.

Cosy in my chair all ready to crochet, I was too lazy to get up and measure my cafetiere, and so just trusted that mine was the same size as the one in the book.

It made up so quickly, and before I knew it I had finished it in an hour or two whilst watching TV. 


But sadly it was too long.......and not wide enough!

AArrghhh!!!!!

So.......after some very careful measuring and fitting this time, rather than undo all my work, I added vertical stripes, turned it up at the bottom, sewed on a button (as per the pattern), and hoped for the best!


Much better!!!!!
And a lesson learnt too - measure first and don't make assumptions!


Still need to get the "real" tree for the hall, but the fake one is looking very cheery with its "bung it all on, the more the merrier, tasteless and all" decor!

Which includes red crocheted baubles that I made a few years ago, and Bella's favourite electric blue velvet deer! (see first tree photo above!)

So tasteful! (not!)


The vintage Christmas tablecloth bought at the Flea market the other day is now in use.....


For a change from the traditional dark red Poinsettia, I bought a creamy/ pale yellowy/ lime greeny one - the photo doesn't do the gorgeous colour justice!


Hope your Christmas preparations are more ahead than mine!


Friday 6 December 2013

Painted Bureau in Annie Sloan Chalk Paint

Following hot on the heels of last week's Annie Sloan painted coffee table, I have been busy again this week with my Annie Sloan Chalk Paints transforming a mahogany bureau that I bought  from a friend.

It had been sitting sad and unwanted in her garage for several years, and when my friend heard I was looking for a little bureau desk with drawers and a flap down lid, she showed it to me and a deal was quickly struck.

This is what the pretty little bureau looked like before - a well-made bureau, with a little surface damage to some of the drawers, and a bit scuffed around the legs, but otherwise in good solid and sound shape and in need of a facelift.


And several days later, here it is........


Using Annie Sloan Country Grey and Original, the same colours used to paint the coffee table in my last post, this is what I did.

***
Annie Sloan Painted Bureau

Removed all handles from drawers and dusted down the bureau - I didn't need to wash it down as it was clean.

Painted one generous coat of Annie Sloan Country Grey using a large flat brush and working quickly -  don't be tempted to go back and touch up an area that you missed as you can sometimes end up taking paint off - better to go back later when dry or leave it altogether. (I painted over the key plates too, then sanded and scraped off most of the paint afterwards to leave a slightly shabby look)

When dry I painted a second coat on the bureau top and desk lid as I wanted a good coverage here.

When the second coat was dry, I lightly sanded all over using a fine grade sandpaper, gently distressing edges and corners which would naturally get knocked and worn. I like a subtly distressed look but you can distress as much as you like, or not at all. Even if you don't want any distressing, I find you achieve a much smoother, silkier finish if you sand before waxing, and it also highlights the brush strokes for a bit of depth and colour variation.

I then used a fine artists paintbrush to paint the bevelled edges of the desk lid and the raised drawer edges with Annie Sloan Original, to add some contrast and highlights.  I also added a highlight to the little pull out runners that support the desk lid. This took several hours as I wanted a fairly neat job. 

I then sanded the white edges, dusted the whole bureau down, then waxed it using Annie Sloan clear wax applied with a soft cloth, applying sparingly but covering it well.

After allowing the wax to dry for a day I buffed it with a duster, then using heavy duty sandpaper I roughly sanded all the handles to remove most of the dark brassy finish. I then re-attached the handles.

And voila! 


Now I must confess at this point that I haven't completely finished the bureau, as I want to paint the inside too - in a contrasting colour, perhaps a pretty pale duck egg blue or pale green - not sure yet.

I'm thinking of maybe mixing up a paler shade of either Annie Sloan Duck Egg or Provence - I have both colours in my paint stash. But it may have to wait until after Christmas now (especially as I have asked Santa for this book...........!)

****

Last week I popped along to the local Antique and Flea Market with Jane from the flower house - she came away with several vintage goodies which I expect she may share with you on her blog (if she hasn't already done so) and I found a few buttons and bits and bobs, and some fabrics.

some pretty vintage hankies, one with lilac crochet and one with a beautiful tiny tatting trim.

some sweet little cross-stitched napkins

vintage hand-painted buttons on original card in dark brown

and more buttons in the same design on white

a delicate handmade lace collar made from tatting

another collar, this one machine embroidered

a very delicately crocheted cream coloured teacosy - presumably to be place over a padded one

a very faded and stained vintage apron made in the prettiest tiny blue roses cotton - am hoping to be able to salvage enough to make something from this

2m of Anna Maria (Horner) fabric for £2, in a very 70's chocolate and white design, from her discontinued Chocolate Lollipop range

and a little xmassy tablecloth for £1

A pretty good haul again!


Hope everyone's Christmas preparations are now well underway - not many weeks to go now, so I'm glad to have most of the present shopping done, and much of the xmas food safely stored away.

Our Christmas cards will be written this weekend ( Bella plans to sit at this very desk to do the job for us which makes me happy - I'm glad it will be used ), and we are planning to get the Christmas tree from our local Christmas Tree farm just outside the village - they open the barn for just a few weeks each year to sell them.

How are you getting on with your preparations?? 
 Are you like my sister, totally organised, and so already finished??!!!

Enjoy the run up to Christmas!


P.S  For those who missed my last post, I finally made a breakthrough and stocked my Etsy Shop at last!!! Just put in a few Christmas decorations, probably a bit late for most people but at least I now know how to stock the shop.  

I will put some of my vintage and antique cushions in to it in the New Year - I was so pleased to have finally done it, but it was a lot of work what with the photos, the measuring, descriptions and weighing for postage!


Monday 25 November 2013

Annie Sloan Painted Coffee Table


Hello everyone, I hope you all had a good weekend. 

Last week was rather busy with some sewing and painting furniture projects, as well as junking and antiqueing, and all the usual rather more mundane day to day stuff . So with all that on top of a bit of socialising, and a lot of dog walking, I somehow didn't find the time to blog, but here I am today better late than never!


Rummaging around the local charity warehouses last week I found this pretty coffee table with a partly split leg for £10.  My other half glued this back together easily, and after a lovely time messing around with Annie Sloan Chalk Paints and wax I transformed it from its original dingy brown-ness.........

 into something a little more pale and elegant..........


It is now painted in two gentle colours: Annie Sloan Chalk Paint Country Grey and Original.  

And to me it now has a distinctly French feel about it.

Here's what I did:

Once the wood glue was dry on the leg, I dusted the table down then wiped it clean with a damp cloth.


Once dry, I painted the whole table with Annie Sloan Country Grey, then when that was dry I gave it a light sanding with fine sandpaper all over.

I then painted the main table top with another coat of Country Grey, and I painted the sides under the table top with a random patchy coat of Annie Sloan Original, touching up with more paint where I felt it needed a bit more depth of colour.


I then painted a thin stripe of Original above the carved edge of the table top (see below) and I picked out the carving on the legs with Original too.


I then sanded the whole lot again once the paint was dry, sanding quite hard where I wanted a bit of distressing, mainly over the carved areas and where the paint would wear most naturally when knocked and bumped into.

Be sure to wipe off all the dust created by sanding.

I then waxed the table all over using Annie Sloan Clear Wax and let it dry for a day. I then buffed it up to give it a lovely soft shine.

The table came with a fitted glass top, but if it hadn't then I would have put a second coat of wax on the table top once the first coat was dry and buffed.


It feels beautifully smooth and silky, mainly because of sanding before the wax. I love a silky-smooth finish, and sanding before waxing when using Annie Sloan paints gives you just that.

A word of warning: don't be tempted to buff too soon after waxing. 

I find it needs at least an overnight wait, and if it still feels a little damp or tacky in places then be patient or else it will rub off where it isn't properly dry once you start buffing. And then you pay the price for your impatience by having to re-wax over those rubbed-off areas!

So I now allow a good 24 hours to dry and then it buffs up a dream!


Poor Logan can't understand why I keep taking photos of the table and not him!

***
More Annie Sloan Chalk Paint Projects


To see my other furniture transformations and projects using Annie Sloan paints then go to my sidebar under categories and search under Annie Sloan or Painted Furniture, or click on the links below for specific projects.

To see how I transformed a kitchen dresser using AS Old Ochre click here....


To see how I updated an old wooden bureau using AS Country Grey click here


See how I transformed an old wooden table with shelf into a dog bed, click here!

 before....
and after - one happy dog!


Updating an old brown chest of drawers using AS Antoinette click here


To see how to make shabby chic plant pots click here


 Transform mirrors, old picture frames and shelves........see post here 

This frame above is the one I painted as part of the Annie Sloan painting course at Dovetails Vintage!


***
Since my last post I've had a couple of visits to the local Antique and Flea Market, and found a few vintage lace and linen pieces, as well as some fabric and a few other vintage bits and pieces.

Here's a few of my finds........


Found this sweet little vintage cross-stitch pin-cushion - it is tiny, (probably only a couple of inches wide) as are the neat stitches. 50p!

And some gorgeous shot taffetas - one a lovely rich amber colour, shot with a darker shade, and a teal (shot with lilac) - beautiful!  Only £1 each length, both about 2 m each - bargain!


A large, very thickly padded old-fashioned teacosy in a tapestry type fabric called out to me.......buy me, buy me!

So how could I not for £2!!!


A gorgeous pair of vintage Laura Ashley curtains.......


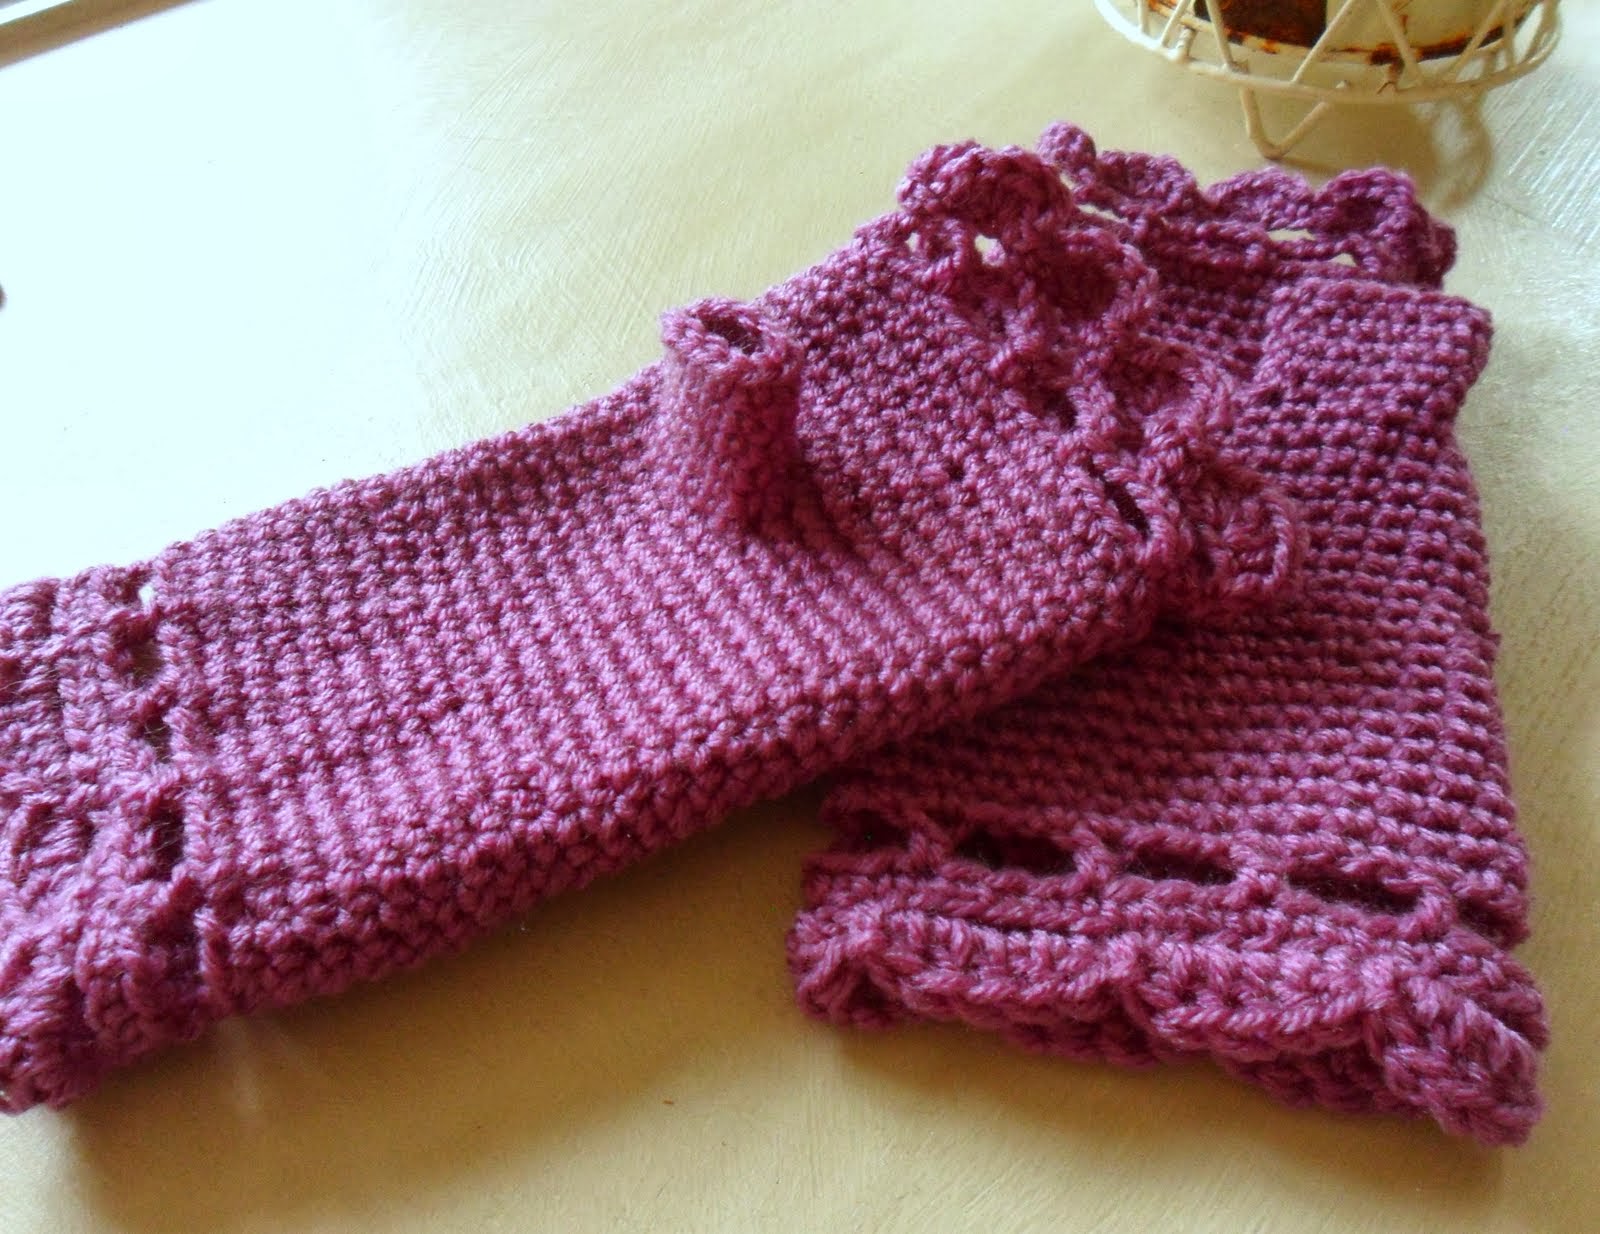
Some vintage crochet patterns..........look at how elegant this blouse is, as is the lady modelling it!


I was excited to find these crochet edgings.... I love making crochet edgings and look forward to trying out some of the easier ones here, and adapting the more complex ones into something my simple crochet skills can cope with!


Some gorgeous vintage embroderie anglais trims and edgings.....


a sweet round vintage work basket and more embroderie anglais.....


And lots of sewing bits and bobs, old elastics and petershams, ribbons and trims....


and some lovely Dorcas pin tins, and an old tape measure


and more beautiful white vintage lace and linens.


These are just some of my finds over the last week or so.

Bringing these home and sorting them has made realise that I must get serious about culling some of my vintage linens and laces, and start to sell some of them on-line. I find it hard to pass up beautiful vintage linens when I find them, but a lot of them need new homes if I am not going to use them myself as they are in their original form, or re-make them into something new.

So already on the list of "things to do" in 2014 is to set up a Vintage Gillyflower Etsy shop.

In the meantime I am making heavy weather out of stocking my Etsy shop with some Christmas Goodies.

Having never put anything up for sale in my Etsy shop I am at last plodding away with the "taking of photos" stage, having already prepared a list of what is going in the shop.

Here's a sneak preview of some of the many Xmas decorations awaiting listing.....


vintage embroidered wool hearts, antique mangle cloth hearts, lavender-filled mangle cloth hearts, tea-stained ticking doves.......


vintage white linen hearts with vintage lace or printed fronts........


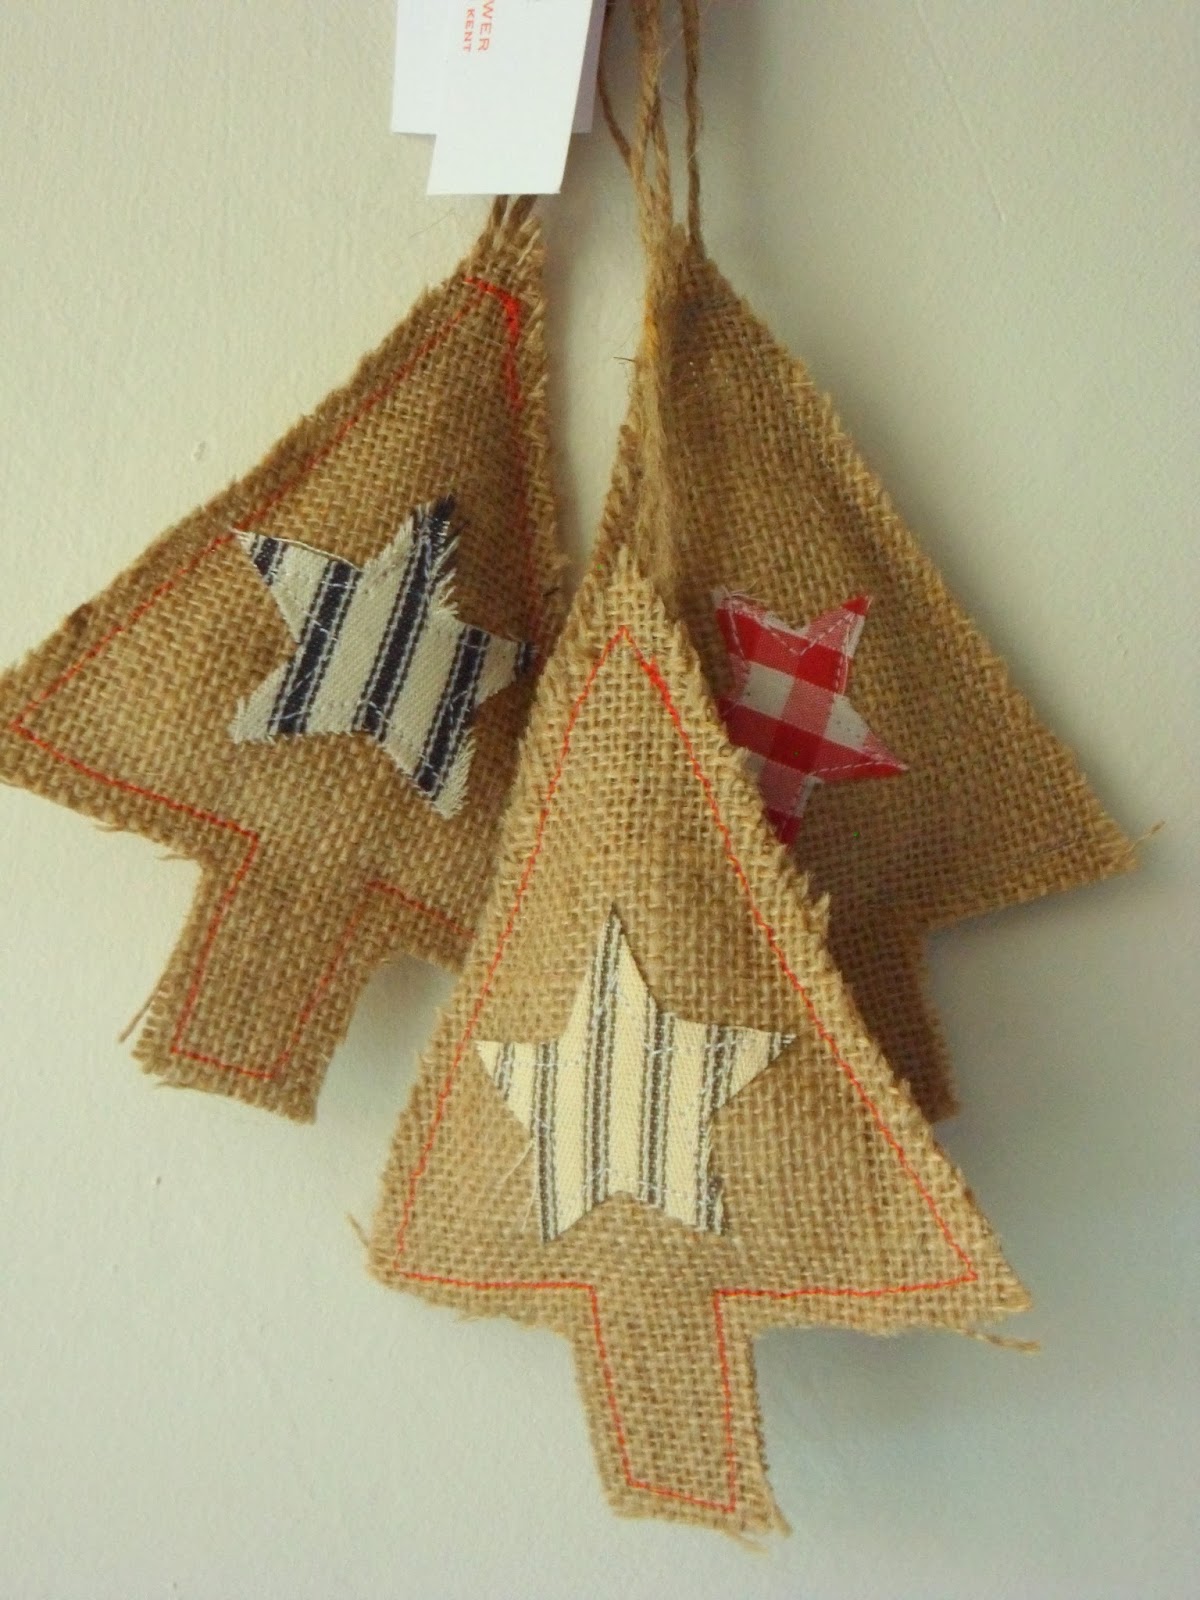
hessian Christmas tree hangers......not many left


natural linen hearts with stencilled number 25.......still lots of these


rusty tin heart hangers.......not many left


vintage linen hearts printed with "Paris".........


All the above and much more to be listed in the next few days in my shop.

If anything takes your fancy in the meantime, please email me for details and prices.

EDITED 30 NOV
Finally "gone live" with my Etsy Shop! Now open for business!
click on the link here to have a peep"